Stimulus Editor
We provide a graphical user interface (GUI) programmed in Matlab MF3D_StimEditor.m to help users of the MF3D R1 stimulus set
to download, select, load, edit, analyse and save the images that they wish to use in
their experiments. The GUI is intended to provide an easy way for users
to select subsets of the 14,000 images and apply simple image
manipulations without requiring them to write their own code. However,
the code can easily be adapted by users who wish to perform other
operations that are not currently implemented in the GUI.
Getting started
MF3D Tools contains scripts that can be used to downloaded the MF3D R1 stimulus sets from Figshare, unzip them and reorganize the directory structure. If you are using Matlab, this can be done using the
MF3D_Installer.m GUI as follows:
Clone the MF3D-Tools GitHub repository by opening a terminal window, navigating to the directory where you want MF3D-Tools installed and run:
git clone https://github.com/Phenomenal-Cat/MF3D-Tools.git
Alternatively, you can download MF3D Tools directly and unzip the folder.
Open Matlab, navigate to the ‘MF3D Tools’ folder and run
MF3D_Installer.min the Matlab command line. Note that the script requires permissions to move the code and image files around.

The MF3D Installer GUI window appears. Use the Install directory field to select a destination folder where you would like the MF3D R1 stimulus set installed. If the MF3D R1 stimulus set is already fully or partially installed, the corresponding fields will turn green.
Select which subsets of the MF3D R1 stimulus set you want to install using the check boxes.
Click the Download* button to begin download and unzipping. If the files are already downloaded (indicated by a full progress bar) but the files have not been reorganized, select Reorganize button.
The parameters used to generate each image in the MF3D R1 stimulus set are provided in the accompanying spreadsheets (.csv files) - one for the expression set and another for the identity set. When the GUI is initialized it first reads these data into Matlab.
Stimulus selection
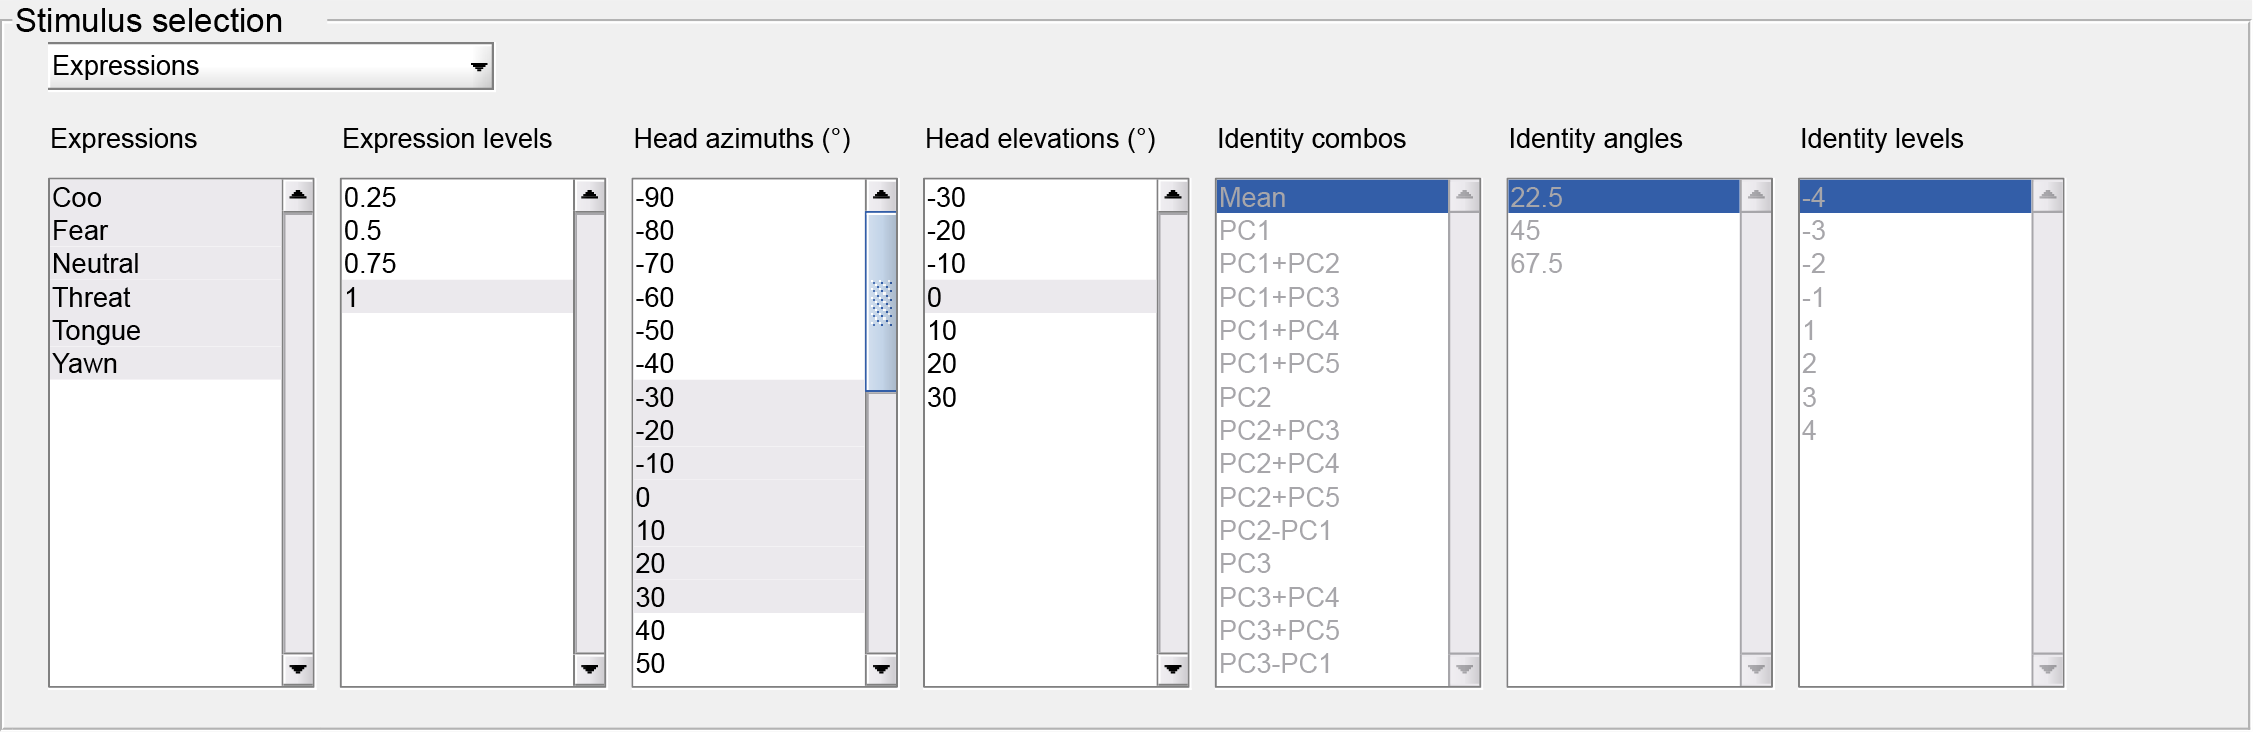
The stimulus set contains 14,000 images, which is more than a single experiment is likely to need. In order to simplify the selection of a subset of the stimuli, the top panel of the GUI allows the filtering of stimuli by a variety of parameters. The drop down menu at the top left allows you to select between the ‘Expressions’ and ‘Identities’ subsets, and will activate and deactivate the corresponding parameter lists. Multiple rows can be selected in each active parameter list, and the total number of images currently selected appears in the top right hand corner of the GUI.
Preview panel
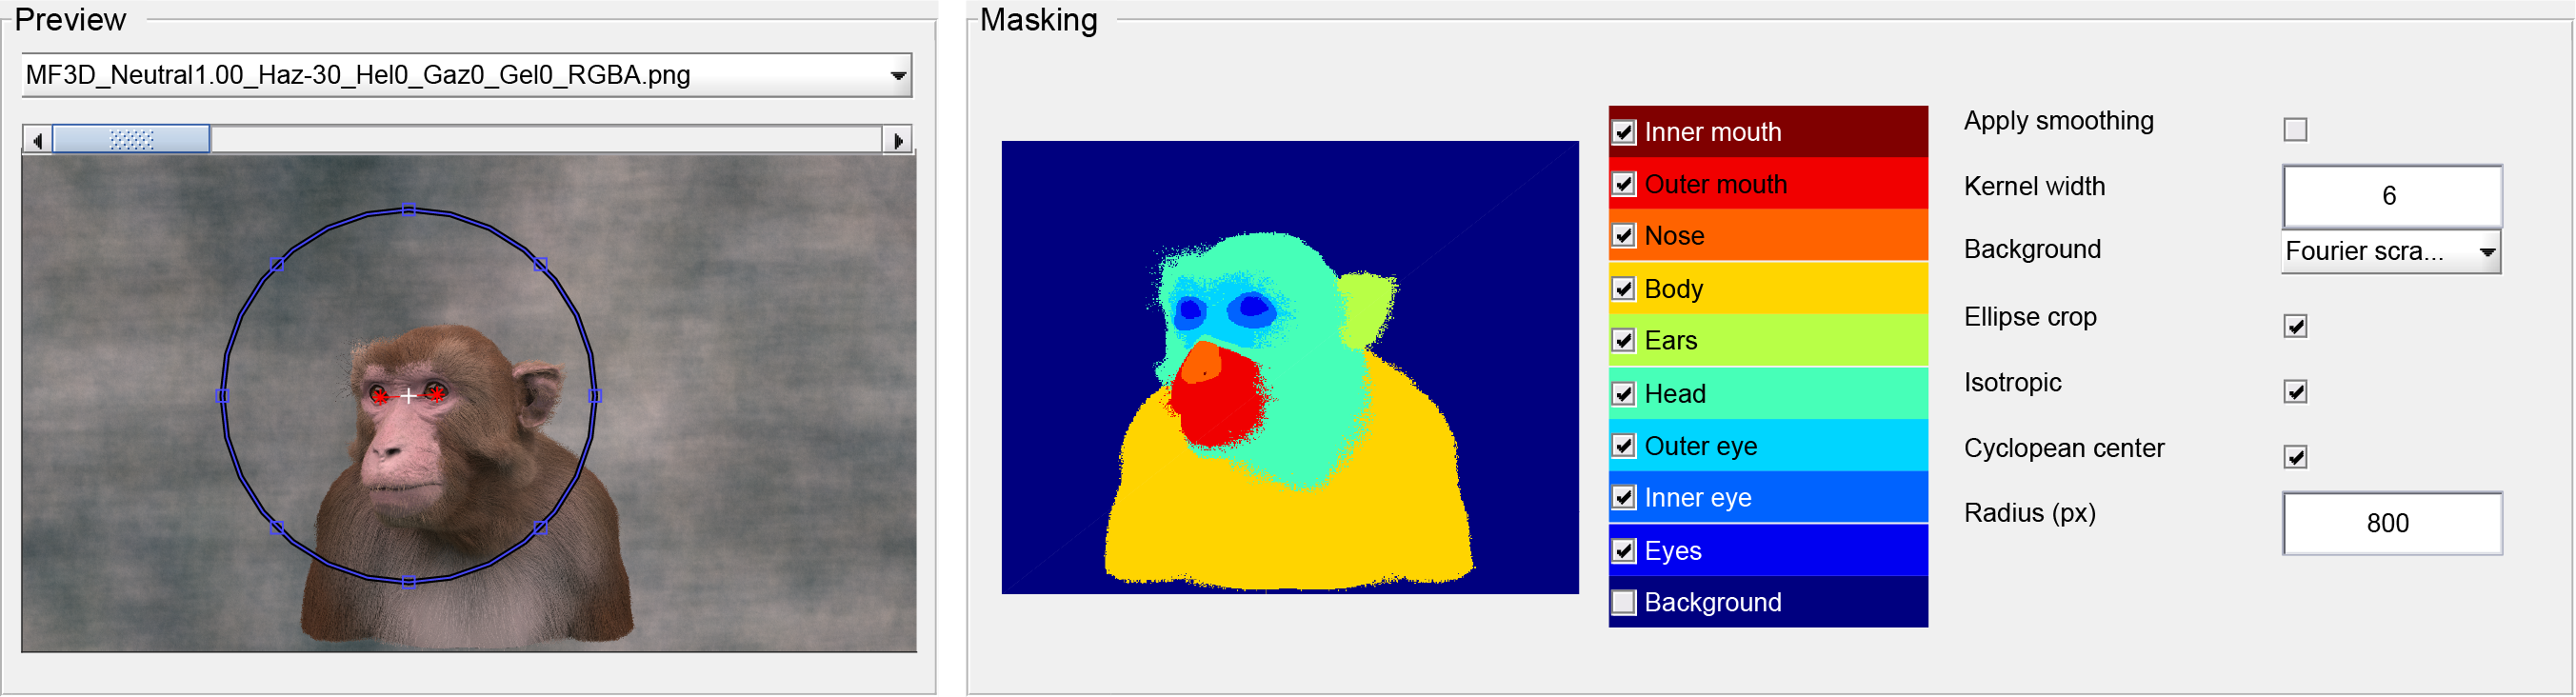
Whenever the stimulus selection is changed, the list of selected images is updated in the dropdown menu of the “badge:Preview panel,badge-success. Selected images can be previewed by either selecting the file name in the dropdown menu, or using the slider to scroll through the selected images.
Image masking
Each color image in the MF3D R1 stimulus set has a corresponding label map, which can be used to mask parts of the image in order to create new variations. In the Masking panel of the stimulus editor GUI users can select color-coded parts of the face, body and background to toggle on or off, which will update the Preview panel image. Additional controls to the left of the Masking panel provide the following functionality:
Apply Smoothing: Apply image smoothing to the label map before masking the color image. This option reduces pixelated edges in the alpha transparency layer of the final images, as can be seen in the
Preview panel.Kernel width: Sets the width of the smoothing kernel (pixels) applied to the label map before masking.
Background: Sets the type of background to use for the output images. The default is transparent (same as input images), but it can also be set to use a solid color or a Fourier scrambled version of the original image.
Ellipse crop: Displays an ellipse in the
Preview panelthat can be dragged, scaled and resized with the mouse. Pixels outside of the ellipse will have alpha transparency values of 0 (fully transparent) when saved. When ellipse crop is enabled, the background selected will only appear inside the ellipse.Isotropic: Maintain a 1:1 aspect ratio ellipse (i.e. circular) crop.
Cyclopean center: this will center the cropping ellipse on the ‘cyclopean eye’ (indicated in the
Preview panelby a white astrisk) by finding the centroid of each group of pixels belonging to the ‘eye’ label group (indicated by red astrisks) and calculating the mid-point. Turning this option on will cause the location of the avatar’s body on the screen to shift as the head turns, but will keep the eyes either side of the centre on the horizontal meridian of the screen across head angles.Radius (px): Sets the radius of the elliptical crop selection in pixels.
Output formatting and rescaling
If you want to save edited versions of the selected stimuli as image files then you can use the options in the Output panel:
File format: select the image file format that you want to save the new images to. If any portion of the edited stimuli is transparent then
.pngwill be the only output file format option.Resolution: if you intend to present the stimuli at a lower resolution than their original 4K then you may want to scale them down in order to reduce file size. Since most visual stimulus presentation software can re-scale images on-the-fly, this is not essential.
Color: sets the color properties of the saved output images. Options include original, grayscale, and hue inverted.
Image analysis and normalization
In traditional reductionist approaches to vision science, it is often considered desirable to either quantify or control the low-level visual properties of the stimuli. The MF3D Stimulus Editor allows users to run various third party functions on the selected stimuli, for example:
SHINE Toolbox (Willenbockel et al., 2010) for normalization of contrast, luminance, spectral power.
Saliency Toolbox (Itti et al., 1998; Harel et al., 2007; etc.) for quantification of visual saliency within images.